Peeling bathtubs can be an eyesore, diminishing the aesthetic appeal of your bathroom and compromising its functionality. Whether caused by wear and tear, harsh cleaning agents, or improper installation, bathtub peeling is a common problem with a straightforward solution. This detailed guide will empower you with the knowledge and techniques to effectively repair and revitalize your peeling bathtub, restoring it to its pristine condition.
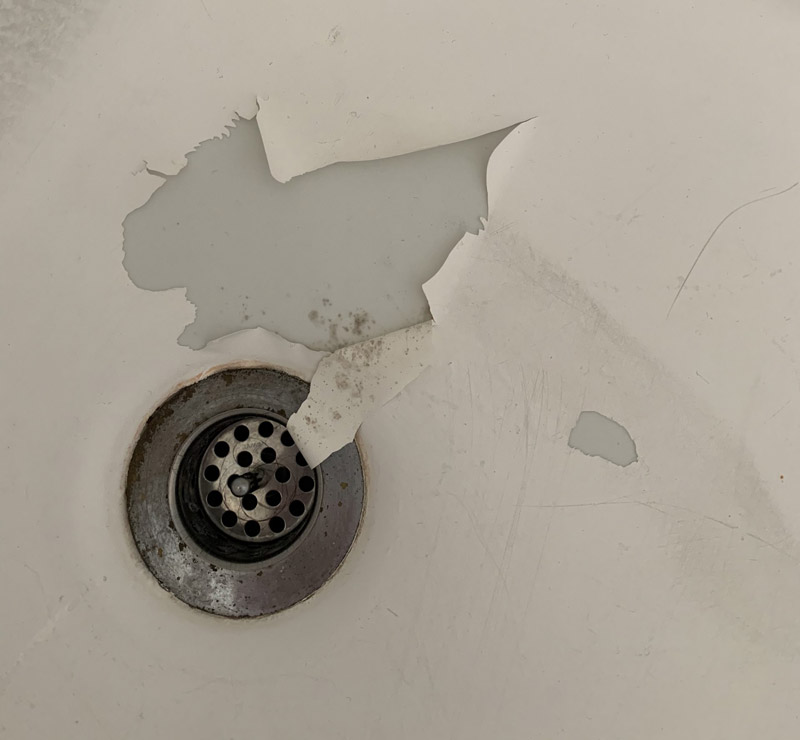
Image: www.designswan.com
Delving into the Causes of Bathtub Peeling
Identifying the underlying cause of bathtub peeling is crucial for preventing its recurrence. The most prevalent reasons include:
- Harsh Cleaning Chemicals: Abrasive cleaners containing bleach or ammonia can strip away the protective layer on bathtubs, leading to peeling paint or enamel.
- Wear and Tear: Over time, friction and exposure to moisture can gradually erode the bathtub’s surface, causing it to flake or peel.
- Improper Installation: Installing bathtubs improperly, without allowing adequate time for the adhesive to set, can result in peeling or delamination.
- Manufacturing Flaws: Occasionally, bathtubs may have inherent defects or imperfections that can manifest as peeling.
The Art of Bathtub Peeling Repair
Restoring a peeling bathtub to its former glory is a multi-step process that demands attention to detail and careful execution. Follow these steps meticulously for optimal results:
1. Thoroughly Clean and Dry the Bathtub: Begin by removing all debris, dirt, and soap scum from the bathtub using a mild cleaning solution. Allow the surface to dry completely before proceeding further.
2. Protect Surrounding Surfaces: Cover nearby walls, fixtures, and flooring with drop cloths or plástico to prevent accidental damage during the repair process.
3. Abrade the Peeling Surface: Gently sand down the peeling areas using medium-grit sandpaper. This will create a smooth, even surface for the new finish to adhere to.
4. Apply Primer: If the bathtub is made of fiberglass or acrylic, apply a specialized primer formulated for adhesion to these materials. Allow the primer to dry completely.
5. Paint or Refinish: Choose a high-quality bathtub paint or refinishing kit that matches the existing color of the bathtub. Apply multiple thin coats of paint or refinishing agent, allowing each coat to dry thoroughly before applying the next.
Expert Insights and DIY Tips for Success
To maximize the lifespan of your repaired bathtub, consider implementing these expert recommendations:
- Utilize Chemical Stripper Prudently: For stubborn peeling, you may need to use a chemical stripper. However, it is crucial to follow the manufacturer’s instructions carefully to avoid damaging the bathtub.
- Create a Well-Ventilated Environment: Wear a respirator and open windows or doors to ensure proper ventilation during chemical stripping or refinishing.
- Allow Ample Drying Time: Allow sufficient time for the repaired area to dry completely before using the bathtub. This will prevent the finish from peeling or chipping.
- Invest in Professional Services: If you are uncomfortable performing DIY repairs or if the bathtub is severely damaged, consider hiring a professional plumber or refinisher.
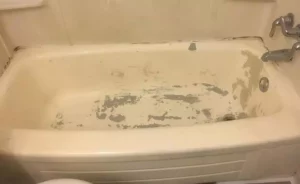
Image: hometuff.com
How To Fix Bathtub Peeling
A Revitalized Bathtub: A Step Towards Bathroom Bliss
By following the comprehensive steps outlined in this guide, you can effectively resolve the issue of bathtub peeling, restoring your bathroom to its former glory. Whether you opt for a DIY approach or seek professional assistance, the result will be a renewed bathtub that will enhance your bathing experience for years to come. Remember, with proper care and maintenance, your repaired bathtub will continue to provide a sanctuary of relaxation and rejuvenation.
