When the smooth, lustrous paintwork of your prized possession succumbs to unsightly bubbles, it can be an emotional blow. Paint bubbles, also known as blisters, mar the aesthetics of your vehicle and may hint at underlying issues. But don’t despair, dear reader, for this article will equip you with the knowledge and techniques to restore your car’s finish to its former glory.
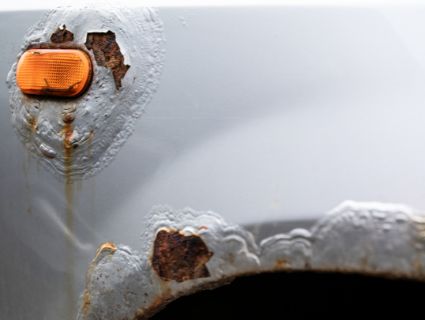
Image: thegrumpymechanic.com
Unveiling the Causes: Why Paint Bubbles Form
To effectively combat paint bubbles, it’s crucial to understand their origins. These pesky blemishes typically arise from moisture or air becoming trapped beneath the paint layer. This can occur due to inadequate surface preparation, poor paint application techniques, or even external factors like extreme weather conditions. Corrosion, lurking beneath the paint, can also contribute to bubble formation.
A Step-by-Step Journey to Eradicating Paint Bubbles
Armed with the knowledge of paint bubble causes, let’s embark on a step-by-step plan to banish them from your vehicle. Remember, success in this endeavor demands patience, precision, and a touch of elbow grease.
1. Preparation: Setting the Stage for Success
Before wielding your tools, thoroughly wash and dry the affected area. Embrace the role of a keen observer, scrutinizing the surface for any signs of rust or corrosion. If you encounter these unwelcome guests, address them promptly to prevent further damage.

Image: houseilove.com
2. Sanding: Smoothing the Canvas
With a fine-grit sandpaper, gently sand the bubbled area in a circular motion. Take care not to apply excessive pressure, as you aim to remove only the damaged paint, leaving the underlying metal intact. For stubborn bubbles, consider using a heat gun to soften the paint, making it more yielding to your sanding efforts.
3. Priming: The Foundation of a Lasting Bond
Once the damaged paint is removed, apply a thin layer of primer specifically formulated for automotive use. This undercoat not only enhances the adhesion of the new paint but also provides protection against corrosion. Allow ample time for the primer to dry before proceeding.
4. Painting: Restoring the Canvas to Its Former Glory
With steady hands and a keen eye for detail, apply a thin layer of automotive paint matching your vehicle’s original hue. Use smooth, even strokes to avoid creating visible brush marks. For optimal results, consider using a spray gun, ensuring an even and professional-looking finish.
5. Drying: Patience is Your Ally
Allow the freshly applied paint to dry thoroughly, adhering to the manufacturer’s recommended drying time. This crucial step ensures the paint adheres properly and withstands the rigors of everyday driving.
Expert Insights: Unlocking the Secrets of Master Painters
To further empower you in your quest to vanquish paint bubbles, let’s consult the wisdom of renowned automotive painters. They unanimously emphasize the significance of meticulous surface preparation, proper paint application techniques, and the use of high-quality materials.
Moreover, they advise embracing patience throughout the process, allowing each layer to dry completely before applying the next. By following these expert guidelines, you’ll increase the likelihood of achieving a flawless finish.
How To Fix Paint Bubbles On Car
Conclusion: A Transformed Canvas for Your Automotive Masterpiece
Restoring the pristine paintwork of your vehicle may seem daunting, but with the knowledge and techniques outlined in this article, you’re fully equipped to tackle the challenge. Remember, patience, precision, and the right materials are your allies in this endeavor. Embrace the transformative power of your own handiwork, rejuvenating your car’s finish and restoring its aesthetic appeal. Your automotive masterpiece awaits, ready to turn heads and elicit admiration on every journey.
