In the realm of home maintenance, tackling a cracked plastic tub can seem like a daunting prospect. Fear not, my fellow DIY enthusiasts, for I’m here to guide you through the intricacies of repairing your cherished tub with an ease that will astound you.
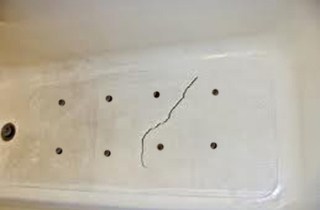
Image: indiatosingporetoaustraliasat4sh.blogspot.com
Cracks in plastic tubs often arise due to the unforgiving wear and tear they endure. Whether it’s the relentless force of water or the impact of tumbling bath products, these unfortunate crevices can mar the beauty of your bathroom sanctuary. However, with the right know-how and a few simple tools, you can restore your tub to its pristine glory.
Types of Cracks:
Understanding the nature of your tub crack is crucial before commencing repairs. Cracks can be categorized into two primary types:
-
Transverse Cracks: These cracks run perpendicular to the tub’s rim, typically caused by impact or sudden weight.
-
Longitudinal Cracks: These cracks align parallel to the tub’s rim, often the result of prolonged stress on the tub material.
Selecting the Right Repair Kit:
The market offers a plethora of repair kits specifically designed for plastic tubs. Your choice will depend on the type of crack, the size of the damage, and your personal preferences. Here are some options to consider:
-
Epoxy Repair Kits: Epoxy is a durable adhesive that forms a strong bond with most plastics. It is ideal for repairing small to medium-sized cracks.
-
Thermoplastic Repair Kits: This type of kit uses a heat-activated adhesive that melts the cracked area, allowing it to fuse together. It is suitable for large cracks.
-
Patch Kits: These kits include self-adhesive patches made from vinyl or rubber. They provide a quick and easy fix for surface cracks.
Step-by-Step Repair Instructions:
With your repair kit in hand, let’s embark on the step-by-step guide to revitalizing your tub:
-
Preparation: Thoroughly clean the damaged area with a degreasing agent. Dry the area completely with a clean cloth.
-
Surface Repair: If the crack is on the tub’s surface, apply the patch or glue according to the manufacturer’s instructions.
-
Crack Repair: For cracks that penetrate deeper into the material, use epoxy or thermoplastic repair. Mix the adhesive components per the instructions and carefully fill the crack.
-
Molding: Shape the adhesive to the contour of the tub, ensuring it slightly overlaps the crack’s edges.
-
Curing: Allow ample time for the repair to cure and bond to the tub’s material.
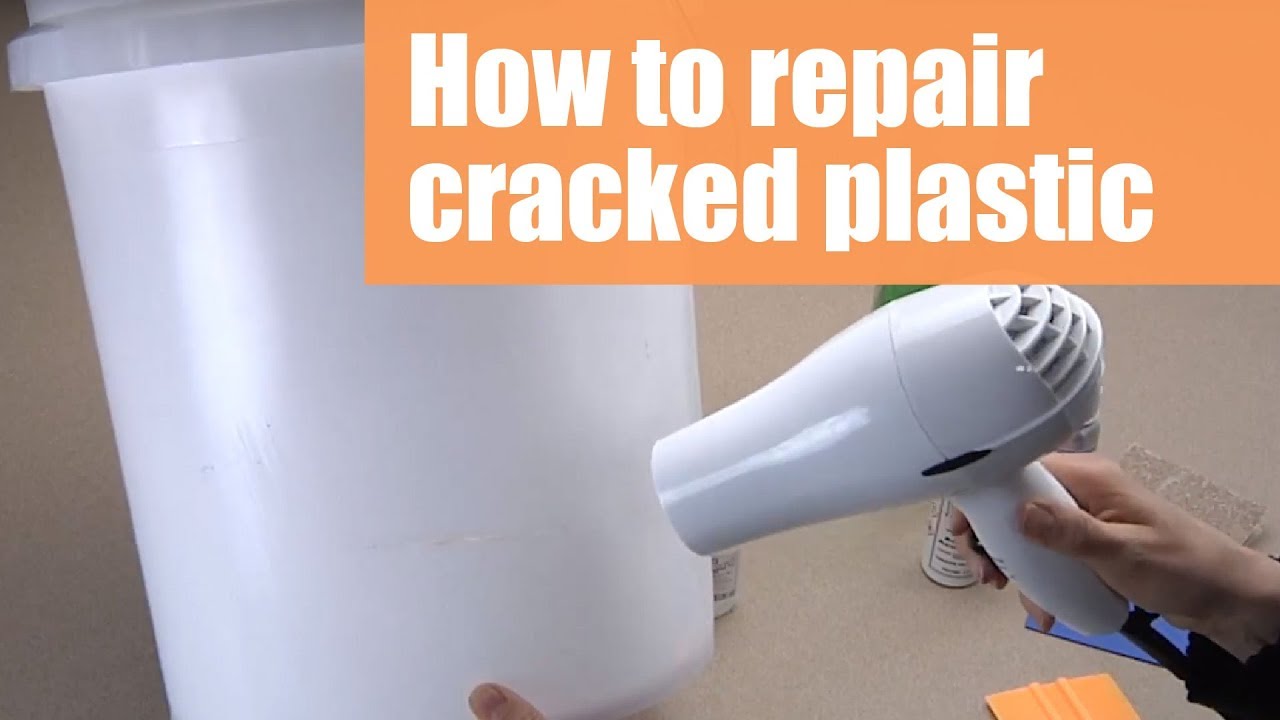
Image: www.youtube.com
Expert Tips:
-
Apply a thin layer of adhesive at a time, using gentle pressure to avoid excess.
-
If the crack is deep, reinforce the repair with a metal bracket secured with screws.
-
For larger cracks, consider using a plastic welding kit that fuses the cracked sections together.
How To Fix Crack In Plastic Tub
https://youtube.com/watch?v=SS2ElwXnEmc
Conclusion:
With these simple yet effective repair techniques, you can bid farewell to unsightly cracks in your plastic tub. Restoring your bathroom’s aesthetic appeal has never been easier. Don’t hesitate to get your hands dirty and breathe new life into your cherished bathtub. Happy repairing!
