The Scourge of Golf Courses: The Dreaded Divot
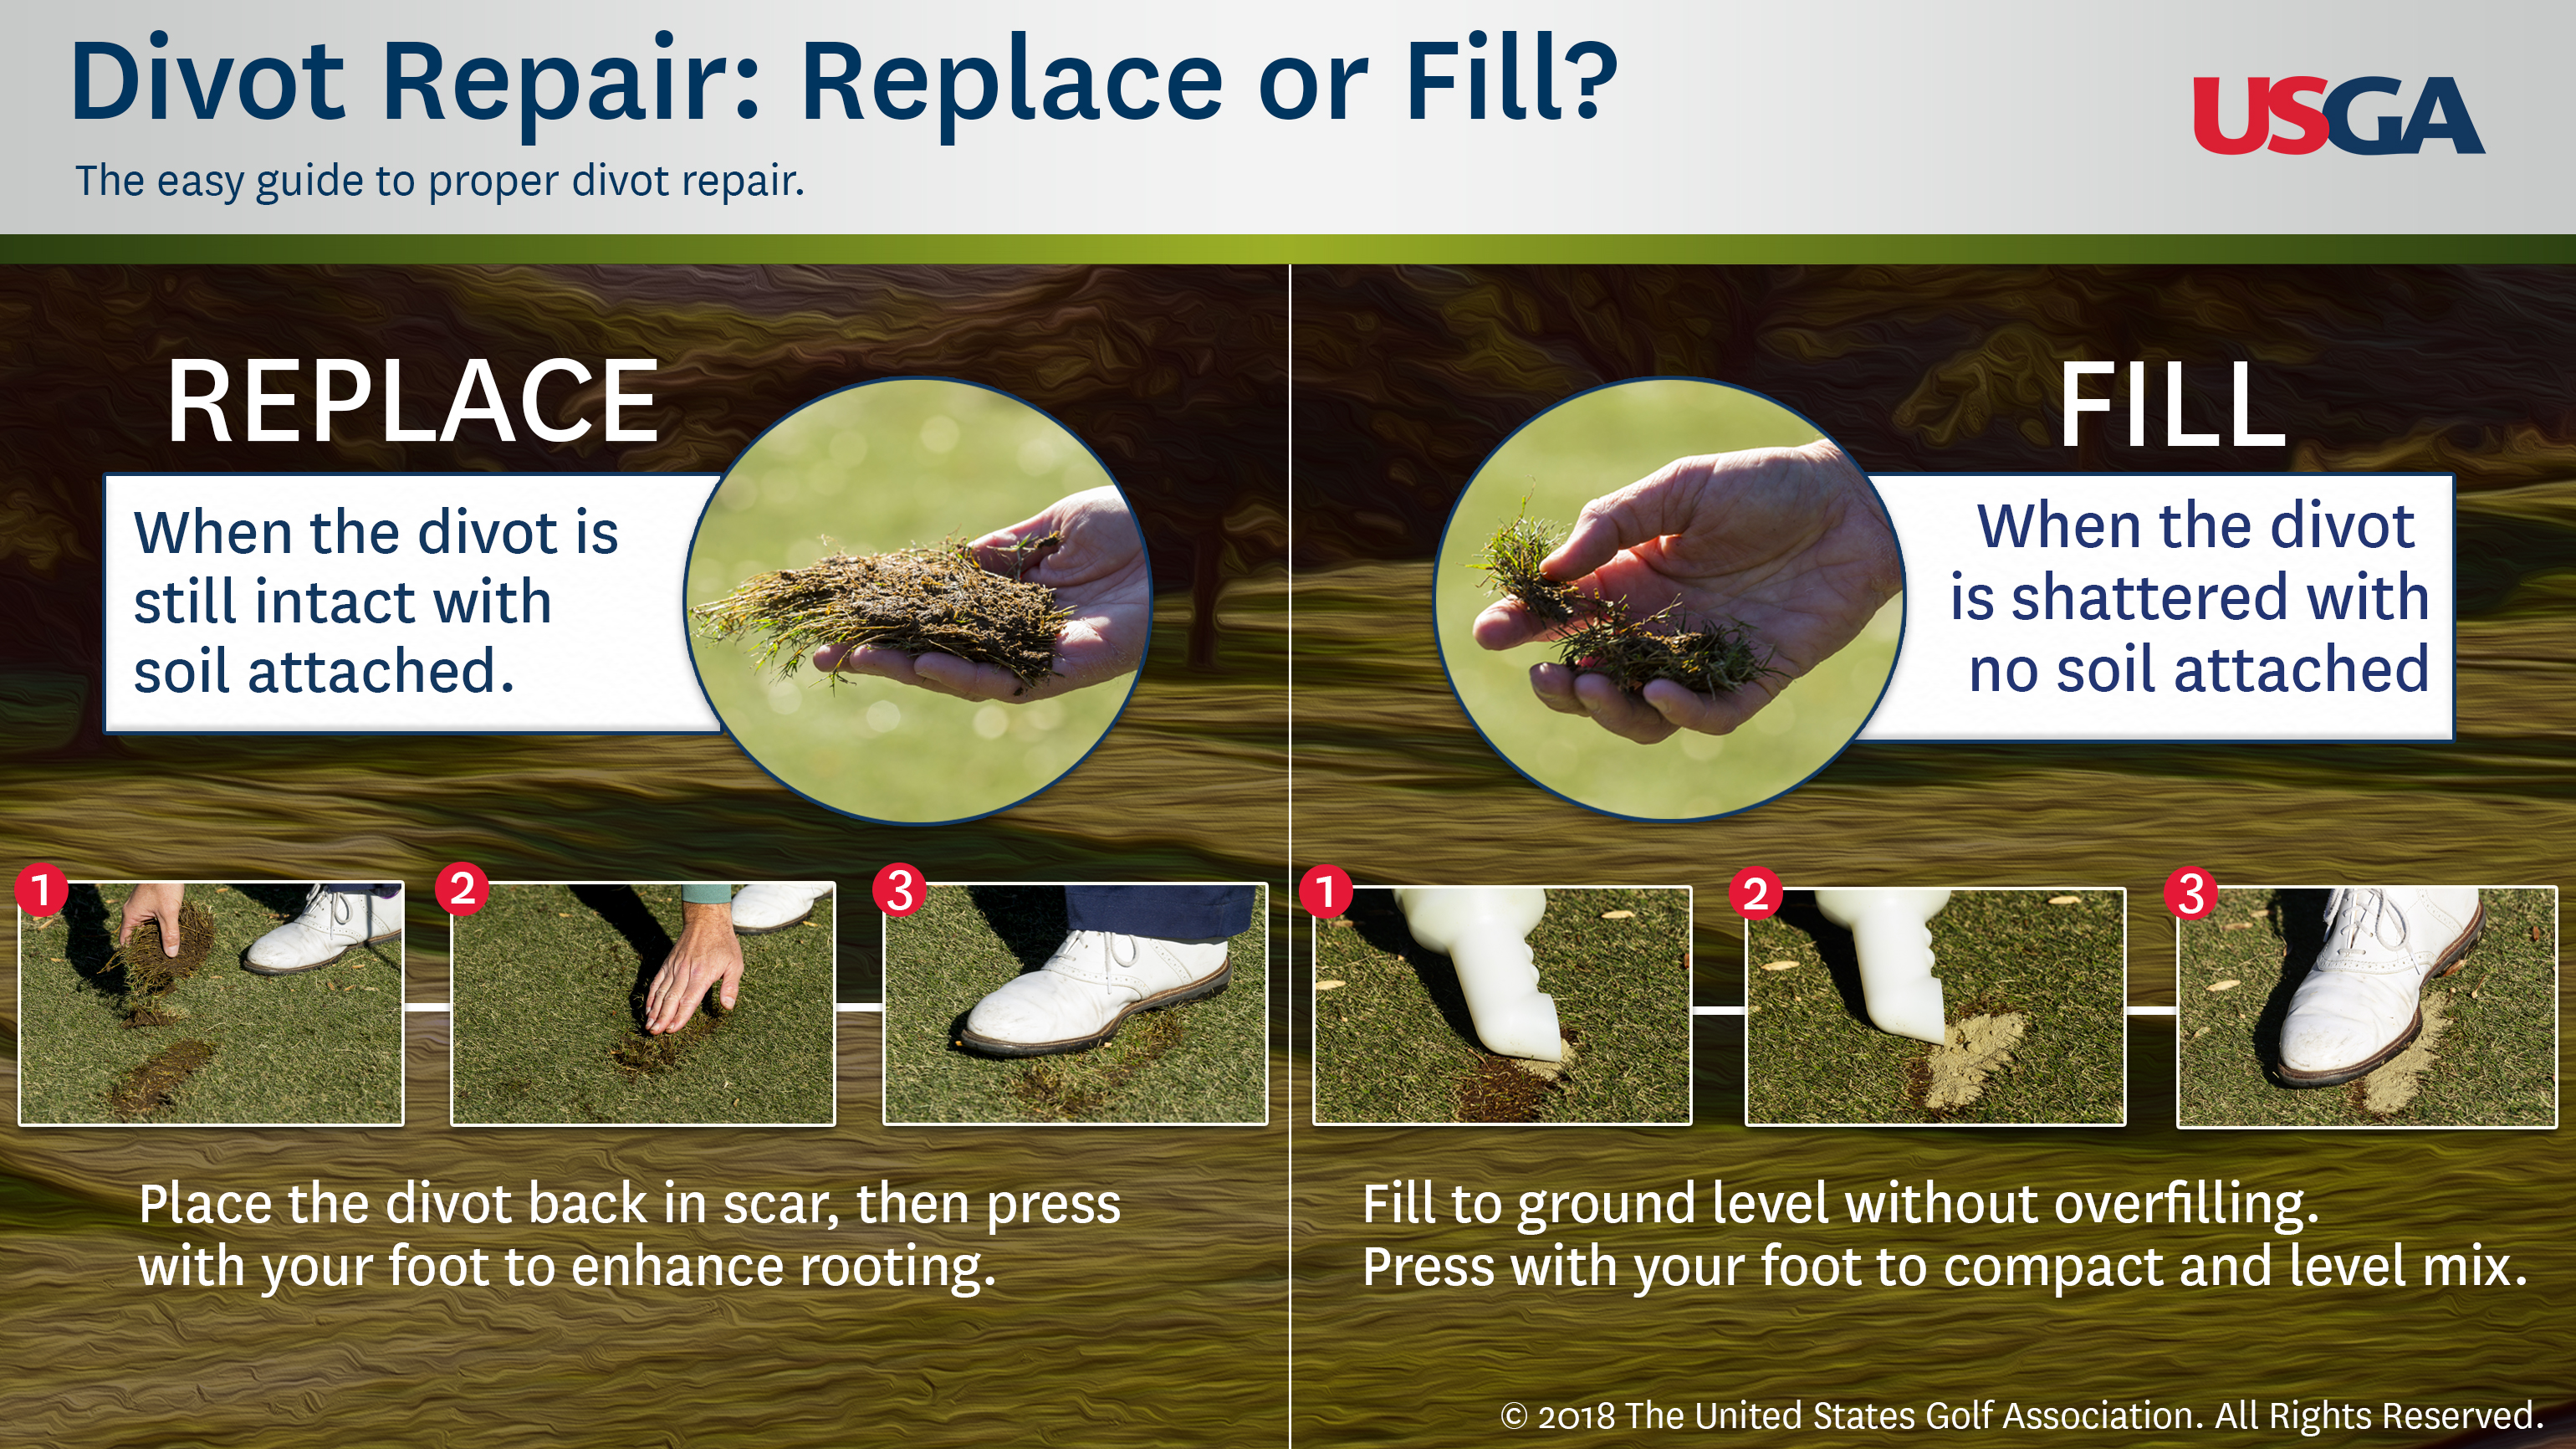
Image: www.usga.org
Golf, a game of precision, etiquette, and respect for the course, can be marred by an inadvertent yet all-too-common occurrence—the divot. These unsightly indentations in the delicate green leave behind unsightly blemishes that detract from the beauty of the course and can impact the play of others. But fret not, fellow golfers, for with the right knowledge and a touch of care, you can master the art of divot repair, transforming your course into a pristine canvas for your golfing endeavors.
Understanding the Anatomy of a Divot
A divot, simply put, is a chunk of turf removed from the green due to the impact of a golf club. It consists of two primary components: the divot itself, being the excised piece of turf, and the footprint, representing the depression left behind in the ground. The size and depth of the divot depend on several factors, including the type of club used, the swing’s force, and the condition of the green.
The Consequences of Unrepaired Divots
Unrepaired divots leave a lasting scar on the green, creating obstacles for fellow golfers and damaging the overall health of the turf. Unfilled footprints allow air and water to penetrate the roots, weakening the grass and potentially leading to disease. Furthermore, the exposed soil becomes hardened over time, resulting in an uneven playing surface that can affect ball roll and putt accuracy.
The Art of Divot Repair: A Step-by-Step Guide
Restoring a divot to its former glory is a simple yet crucial task that all golfers should embrace. With a few simple steps, you can contribute to the preservation of the course and ensure a smooth and enjoyable golfing experience for yourself and others.
1. Assess the Damage:
Before initiating repairs, carefully examine the extent of the divot. Determine its size, depth, and any surrounding damage. Assess the condition of the turf, noting its moisture content and firmness.
2. Replace the Divot:
Using your fingers or a divot tool, gently remove the detached divot and place it back into its rightful spot within the footprint. Ensure it fits snugly, with no gaps or overlapping.
3. Press and Smooth:
Apply gentle pressure to the replaced divot, pressing it down firmly into the ground. Use the back of your putter or a divot repair tool to smooth the edges and blend it seamlessly with the surrounding turf.
4. Identify and Fill Cracks:
In cases where the divot is larger or has caused cracks, additional soil or sand may be required to fill the gaps. Gently spread the filler into the cracks and press it down, taking care not to overfill the area.
5. Water the Repair (Optional):
If the green allows watering, lightly mist the repaired area to promote healing and root growth. Avoid excessive watering, as soggy soil can hinder the turf’s recovery.
6. Mark and Monitor:
To protect the repaired divot from further damage, it’s advisable to mark it with a tee or stake. This indicates to other golfers that the area is under repair and should be avoided. Monitor the divot’s progress and water it as needed until it fully recovers.
Conclusion
The ability to fix a divot is an essential skill for any golfer who values both the beauty of the course and the integrity of the game. By following the steps outlined above, you become an active participant in preserving the pristine condition of your favorite greens. Remember, each divot repaired is not just a restoration but also a testament to your respect for the course and your fellow golfers. Embrace the art of divot repair, and let us work together to create a golfing paradise where every shot is a delight and every green a masterpiece of nature’s artistry.

Image: www.youtube.com
How To Fix A Divot
