Water is an essential part of our lives, and when our faucets don’t function properly, it can be incredibly frustrating. A leaky faucet, especially one that won’t turn off at all, can waste hundreds of gallons of water and drive up your utility bills unnecessarily. But don’t worry; with the right tools and a little bit of patience, you can fix a faucet that won’t turn off in no time. Here’s a comprehensive guide to help you get started:
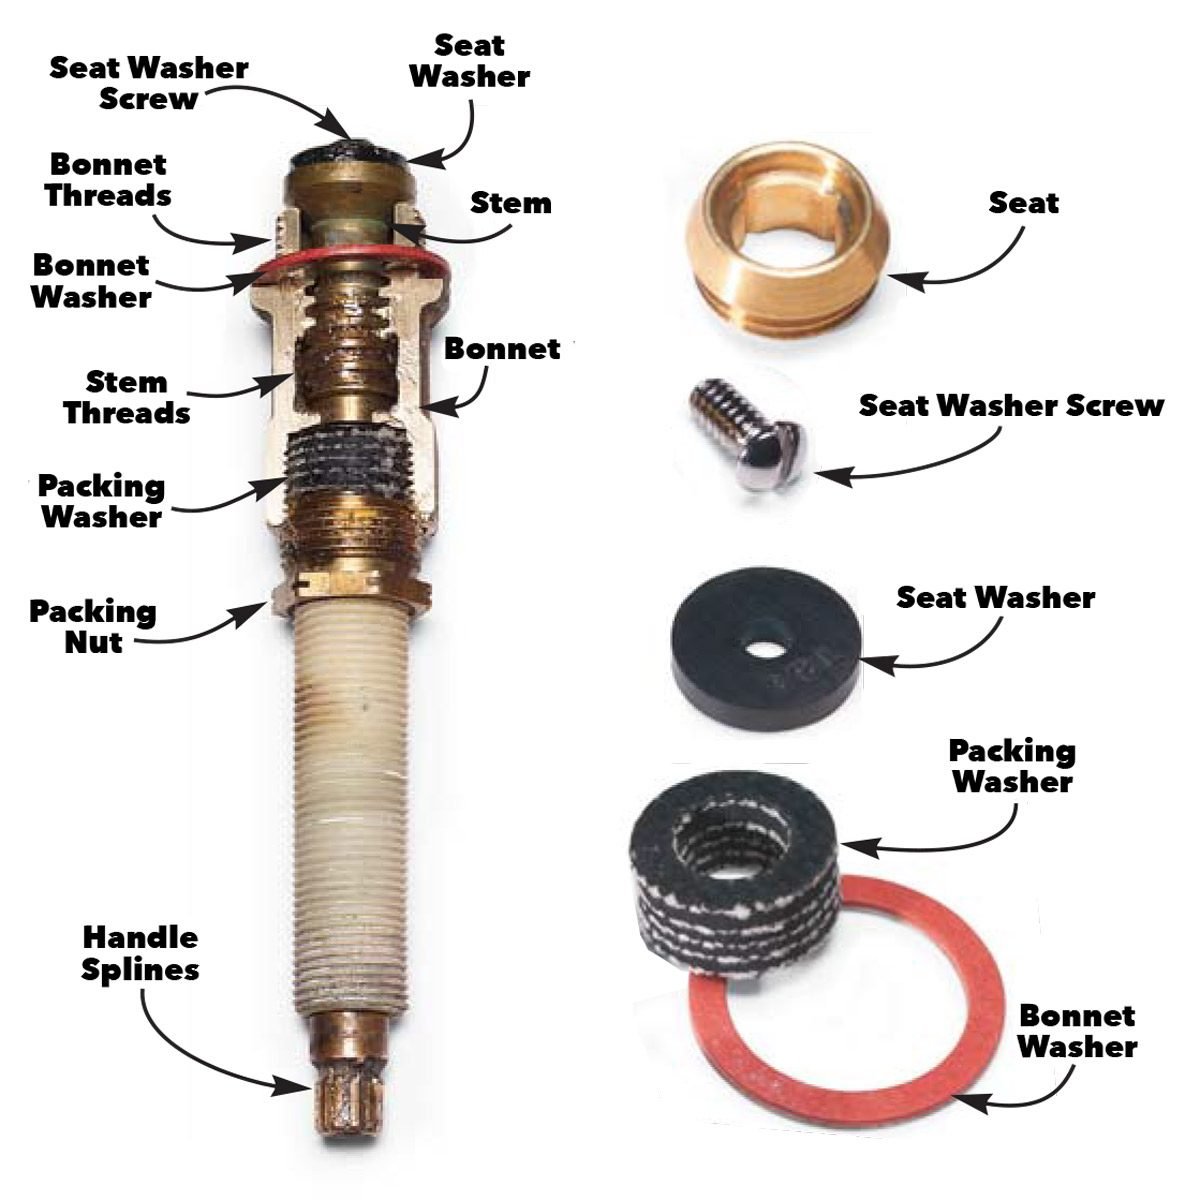
Image: www.familyhandyman.com
Understanding Faucets and Their Common Issues
Faucets have two main components: the handle and the cartridge. The handle is what you use to control the flow of water, while the cartridge is what actually stops and starts the water flow. When a faucet won’t turn off, it’s usually because either the handle or the cartridge is faulty.
There are two main types of faucets: compression faucets and cartridge faucets. Compression faucets use a washer to seal the water flow, while cartridge faucets use a rubber or ceramic cartridge to do the same job. Washer faucets are less likely to have problems, but both types can suffer from leaks.
Image: www.youtube.com
How To Fix A Faucet That Won’T Turn Off
Step-by-Step Guide to Fixing a Faucet That Won’t Turn Off
Before you start, gather some basic tools like a wrench, pliers, and a screwdriver. If you’re working on a cartridge faucet, you’ll probably also need a cartridge puller. You can find all of these tools at your local hardware store.
Once you have your tools, follow these steps to turn off your faucet:
-
Turn off the water supply. This is usually done by turning the shut-off valves underneath the sink. If you don’t have shut-off valves, you’ll need to turn off the main water supply to the house.
-
Remove the handle. With the water turned off, you can remove the handle by unscrewing the screw holding it in place. Be careful not to lose the screw; you’ll need it later.
-
Remove the packing nut. The packing nut is the brass nut that holds the cartridge in place. Use a wrench to loosen the packing nut and remove it.
-
Remove the cartridge. If you’re working on a compression faucet, you’ll need to replace the washer inside the cartridge. If you’re working on a cartridge faucet, you’ll need to remove the cartridge itself. Use the cartridge puller to do this.
-
Install a new cartridge or washer. If you’re replacing a washer, make sure to buy one that’s the same size as the old one. If you’re replacing a cartridge, make sure to buy one that’s compatible with your faucet model.
-
Reassemble the faucet. Once you have the new cartridge or washer in place, reassemble the faucet in reverse order. Make sure to tighten all of the nuts and screws securely.
-
Turn on the water supply and test the faucet. Once the faucet is reassembled, turn on the water supply and test the faucet to make sure it’s working properly.
Fixing a faucet that won’t turn off yourself is a relatively simple task that most DIYers can handle. With the right tools and a bit of patience, you can get your faucet working properly again in no time.
